Many ecommerce businesses find it difficult to keep up with fast-changing ecommerce demands. It is tough, especially if you want a flexible, fast, and easy-to-customize store without coding.
BigCommerce Catalyst is a modern headless storefront framework built on Next.js that helps merchants and developers create super-fast, fully customizable online stores. One-Click Catalyst makes it even easier with a visual editor (Makeswift) so you can launch your storefront in just a few clicks.
In this blog, learn how to set up, customize, and deploy your One-Click Catalyst storefront quickly and easily.
ON THIS PAGE
Prerequisites
Before you get started, make sure you have:
- A BigCommerce store or sandbox environment
- Node.js v20.x
- Corepack-enabled pnpm
- Git version 2.35.x or later
- Required channel permissions:
- Manage Channels
- Create Channels
- Edit Channels
- Install Applications
- A Vercel account for deployment (recommended)
Step-by-Step Guide for One-Click Catalyst Setup
Step 1: Create a Catalyst Storefront
Start by heading over to your BigCommerce admin dashboard: Channels → Catalyst → Create Channel
This will kick off the Catalyst setup process, allowing you to create your new storefront and its associated website.

Step 2: Configure Storefront Information
Now, it’s time to fill in the necessary details like:
- Storefront Name
- Sample Data: Opt to include demo products, categories, and more to help you visualize the user interface better.
- Primary Language: Set the default language for your storefront.
- Additional Languages (Optional): Add any other languages you want to support
Tip : Including sample data can be really useful during the development and theming stages.

Step 3: Access the Storefront
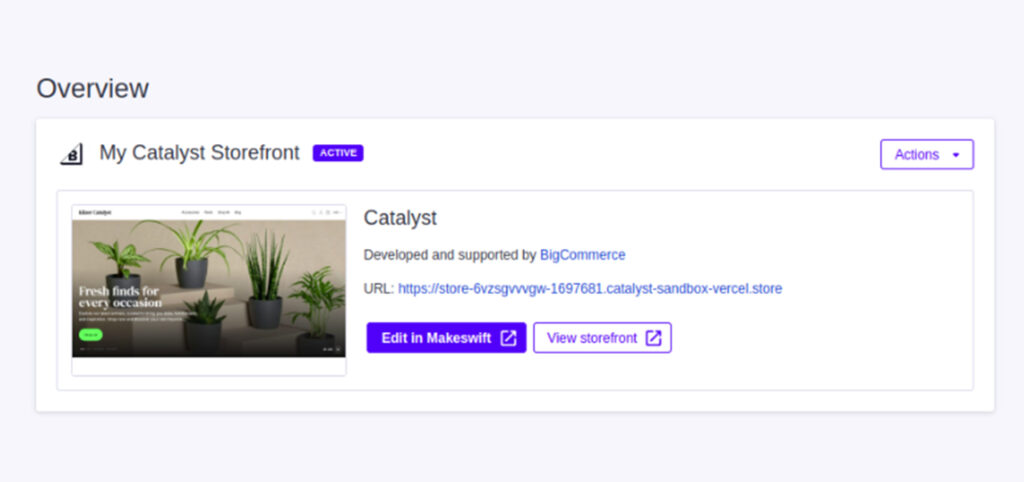
After completing the setup, your new Catalyst Storefront will show up in the list. Just click on the storefront name to check out your newly created site.
Step 4: Customize Design with Makeswift
Every One-Click Catalyst storefront is linked with Makeswift, a visual page builder that allows both non-technical users and designers to tweak layouts and content without needing to write any code.
The Makeswift site includes pre-built content such as pages, custom components, theming options, and more.
Click “Edit in Makeswift” to start making changes to:
- Pages
- Custom components
- Themes
- SEO settings
Hit “View Storefront” to see a live preview of your site.
Note : Makeswift is a fantastic tool that bridges the gap between design and development with its intuitive drag-and-drop editor.

Step 5: Step 5: Set Up Your Local Development Environment
To tweak the storefront at the code level, you’ll need to pull the source code from your BigCommerce backend.
1. In the “Complete Setup” section, toggle the “Start Development” option.
2. Copy the auto-generated setup command, which comes with all the necessary environment variables and repository references.

| corepack enable pnpm && pnpm create @bigcommerce/catalyst@latest –repository bigcommerce/catalyst –gh-ref xxxxxxxxxxxxxxxxxxxxxxx –reset-main –store-hash xxxxxx –channel-id xxxxxxxx –storefront-token ***** –env ENABLE_ADMIN_ROUTE=***** –env AUTH_SECRET=***** –env TURBO_REMOTE_CACHE_SIGNATURE_KEY=***** –env MAKESWIFT_SITE_API_KEY=***** –env TRAILING_SLASH=***** |
3. Make sure to replace the placeholders with the actual values from your backend setup screen.
4. After installation, head over to your project directory and run below command to start the development server with:
pnpm run dev


Your storefront will now be accessible locally at http://localhost:3000/.
How to Deploy your store to Vercel after you’ve wrapped up development
After completing the development, follow the deployment instructions provided in the below steps to publish your storefront using Vercel.
1. Push Your Code to a Git Repository
Start by pushing your local Catalyst project to GitHub, GitLab, or Bitbucket.

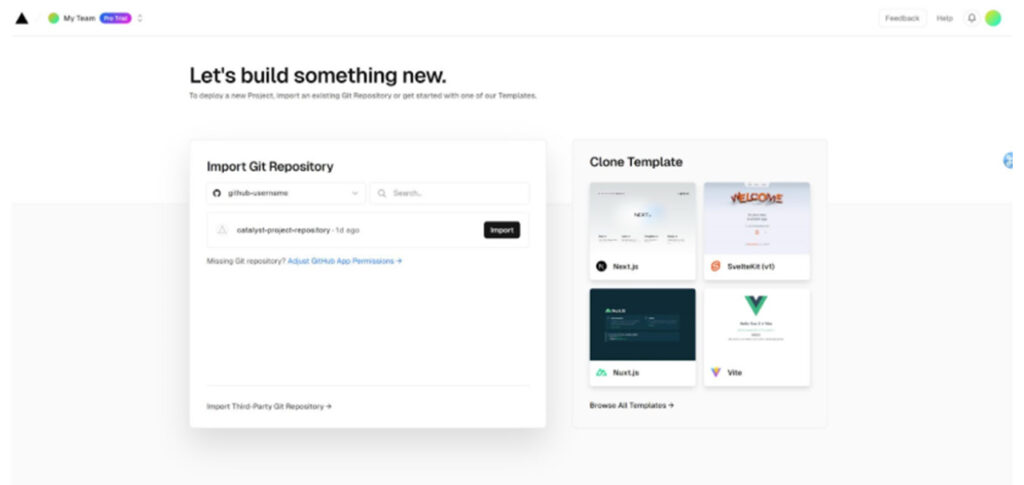
2. Connect Your Repository to Vercel
– Head over to the Vercel Dashboard
– Click on “Add New” and then select “Project“
– Choose your connected repository


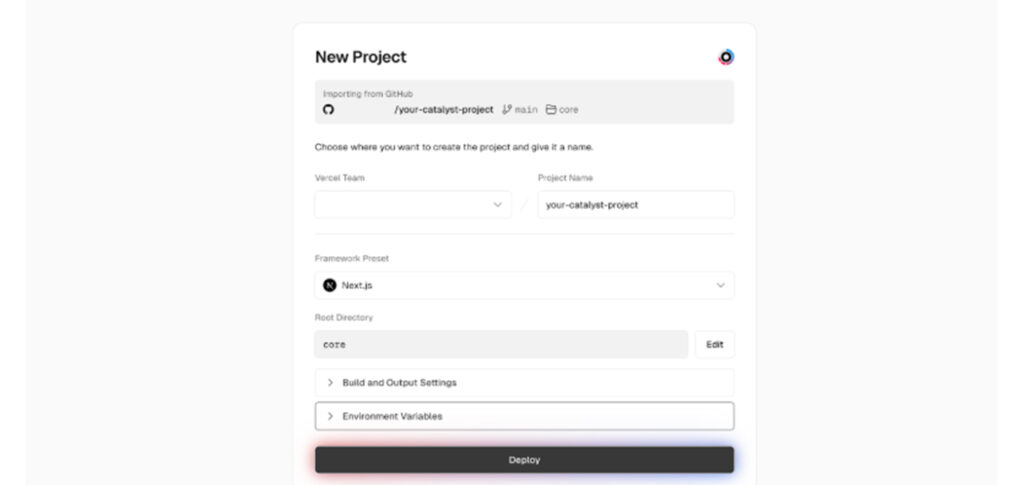
4. Add Your Environment Variables
Don’t forget to include the necessary environment variables in Vercel, like API tokens, Store Hash, Channel ID, and so on. You can usually find these in your .env file that was created during the Catalyst setup.
Tip: Always keep your environment variables secure and avoid pushing them to Git.

5. Deploy Your Storefront
Hit the Deploy button, and Vercel will take care of building and hosting your Catalyst storefront.
Your live site will be available on a Vercel-generated domain (like your-project.vercel.app), or you can link it to a custom domain.
Why You Should Choose One-Click Catalyst?

- Quick Setup: Get your headless storefront up and running in no time with just a few tweaks.
- Visual Editing: Give your marketing and design teams the tools they need with Makeswift’s easy drag-and-drop interface.
- Total Customization: Seamlessly switch from visual editing to local code development whenever you need.
- Scalable & High-Performance: Built on Next.js, it’s designed for top-notch SEO and lightning-fast speed.
Useful Tips
– For efficient development, use VS Code along with Tailwind and ESLint plugins.
– Dive into the core/components directory to tailor the UI to your liking.
– Leverage Catalyst’s built-in GraphQL queries to easily fetch product, category, and cart data.
– Enhance the checkout experience by integrating third-party services or crafting custom pages.
Build Smarter, Sell Faster with One-Click Catalyst
Whether you’re just starting out or running an established business, One-Click Catalyst gives you the tools to build a fast, flexible, and fully customizable online store. With visual editing through Makeswift and the option to add custom code, you get the best of both worlds.
Want help building your store the right way? Reach out to enterprise commerce solutions partner like Klizer. Check out our Headless commerce development to see how we help brands like yours launch faster and grow online.


