Managing thousands of orders efficiently in Magento 2 depends heavily on how well you understand the order lifecycle — especially the difference between order state and order status. While they often get used interchangeably, they serve different roles in Magento’s architecture.
In this guide, we’ll walk through:
- What order states and statuses are (and how they relate)
- The default Magento 2 order states and statuses
- When and why to create custom order statuses
- How to programmatically add and assign a custom status in Magento 2
ON THIS PAGE
What’s the Difference Between Order State and Order Status?
Order State
The order state represents a broad stage in the lifecycle of an order. It reflects what phase the order is in — like whether it’s new, processing, complete, or canceled.
Examples of default order states:
- New – When an order is just placed.
- Processing – When payment is confirmed and items are being prepared.
- Complete – When the order has been invoiced and shipped.
- Closed – When the order has been delivered to the customer/refunded.
- Canceled – When the order has been placed and the customer canceled the order due to some reason.
- Hold, Payment Review, Fraud, etc.
Magento controls order state transitions, and these are usually tied to key business logic, such as invoicing and shipping.
Order Status
Order status is more granular — it describes the current condition of an order within its state. Multiple statuses can be linked to a single state.
Example:
- An order in the processing state could have:
- pending_payment
- awaiting_fulfillment
- ready_to_ship
- pending_payment
You can create custom statuses to better reflect your operations, like “waiting for supplier confirmation” or “picked and packed.”
Think of it this way:
State = The phase in the journey
Status = The label describing the current step in that phase
Default Magento 2 Order States and Their Statuses
Here’s a quick overview of Magento’s built-in states and some statuses:
| State | Default Statuses |
| new | pending |
| processing | processing |
| complete | complete |
| closed | closed |
| canceled | canceled |
| holded | holded |
| payment_review | fraud, pending_payment, payment_review |
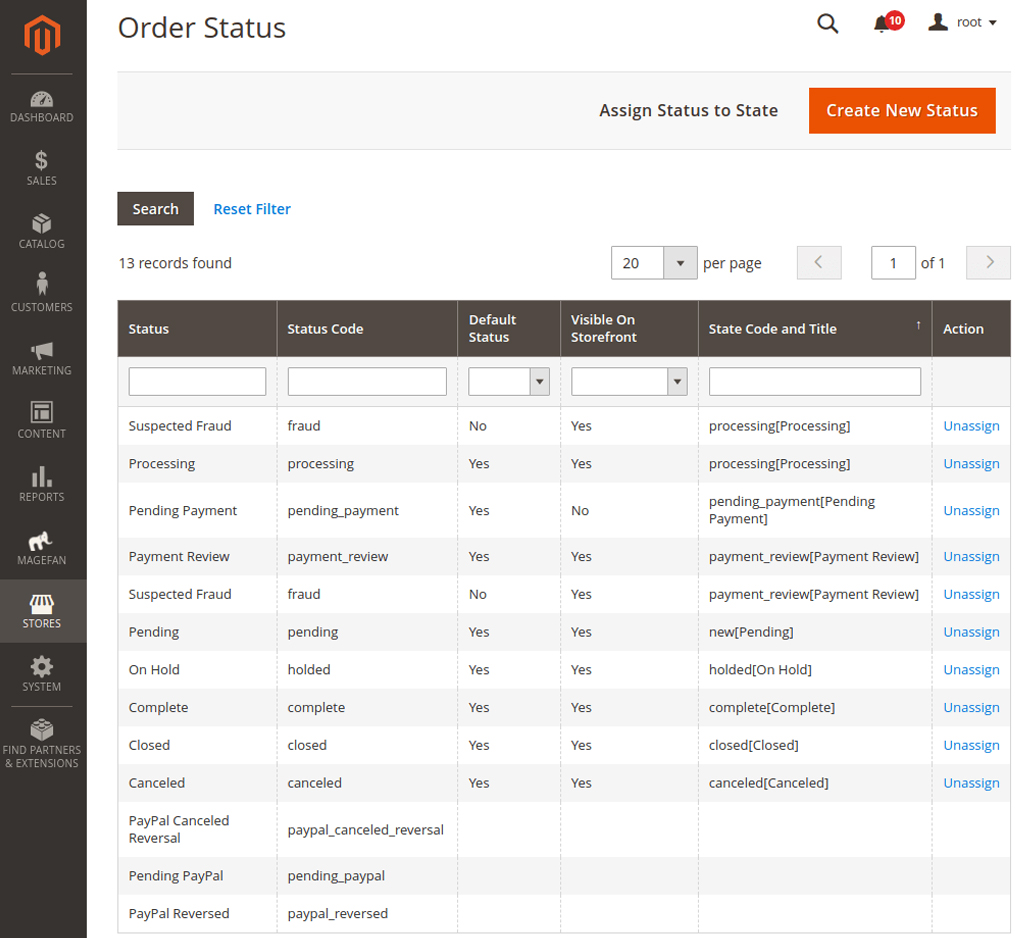
How to Create and Manage Order Status & Order State in Admin Panel
6 Simple Steps to Create a New Order Status in Magento 2
- Log in to your Magento 2 Admin Panel.
- Navigate to:
Stores → Settings → Order Status - On the top right, click Create New Status.
4. Fill in the fields under Order Status Information:
- Status Code: This must begin with a lowercase letter (a-z). You can use letters, numbers, and underscores (_). Avoid spaces — use underscores instead (e.g., pending_verification).
- Status Label: This is the name that will appear on the admin backend and optionally on the frontend.
5. If you operate a multi-store setup and want to show different labels per store view, scroll to the Store View Specific Labels section and add appropriate labels for each view.
6. Once all fields are completed, click Save Status.


How to Assign the Order Status to a State
After creating the custom order status, the next step is to assign it to an order state.
- On the Order Status page, click Assign Status to State in the upper right.

2. Fill in the Assignment Information:
Order Status: Choose the newly created status from the dropdown list.
Order State: Select the state where this status belongs (e.g., processing, complete, holded, etc.).
Use Order Status as Default: Check this box if you want this to be the default status for the selected state.
Visible on Storefront: Tick this if you want the order status to be visible to customers on the frontend (My Account, order history, etc.).
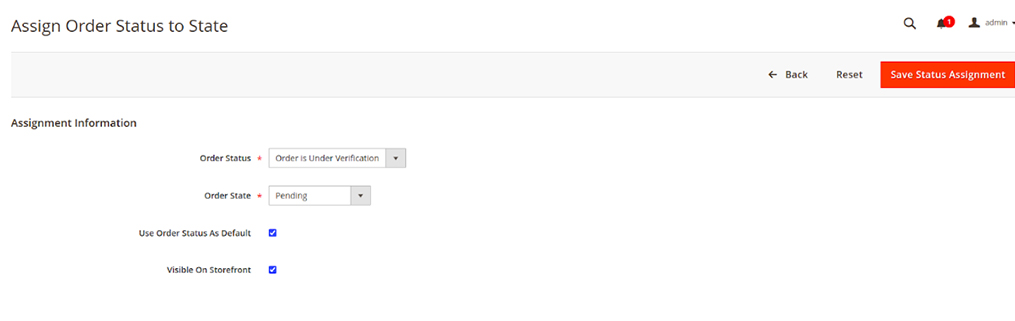
3. Click Save Status Assignment.

How to Edit an Existing Order Status
You can easily make updates to an existing order status if needed.
- Go to:
Stores → Settings → Order Status - Find the status you want to update in the list and click on it.
- Modify the label or specific labels for store views as required.
- Click Save Status to apply the changes.
Note: You cannot change the status code of an existing status — only the label and store-specific labels are able to change.
How to Remove an Order Status from an Assigned State
You might need to unassign a status from its order state in cases like workflow changes or cleanup.
- On the Order Status page, locate the status that you want to unassign.
- Under the Action column, click Unassign next to the state assignment you want to remove.
- Confirm the action if prompted. The status will remain in Magento, but it will no longer be associated with that state.
How to Create and Manage Order Status & Order State in Programmatically
Declare Status in the data Install Script or Patch.
Create a custom module or use your existing one.
Example: app/code/Klizer/CustomOrderStatus/Setup/Patch/Data/AddCustomOrderStatus.php
<?php

namespace Klizer\ImageSearch\Setup\Patch\Data;

use Magento\Framework\Setup\Patch\DataPatchInterface;
use Magento\Sales\Model\Order\StatusFactory;
use Magento\Sales\Model\ResourceModel\Order\Status as StatusResource;

class AddCustomOrderStatus implements DataPatchInterface
{
    private $statusFactory;
    private $statusResource;

    public function __construct(
        StatusFactory $statusFactory,
        StatusResource $statusResource
    ) {
        $this->statusFactory = $statusFactory;
        $this->statusResource = $statusResource;
    }

    public function apply()
    {
        $status = $this->statusFactory->create();
        $status->setData('status', 'pending_verification')
               ->setData('label', 'Order is Under Verification');
        $this->statusResource->save($status);
        $status->assignState(new, false, true); // assign to 'pending' state
    }

    public static function getDependencies() {
        return [];
    }
    public function getAliases() {
        return [];
    }
}
Final Thoughts
Having a clear and customized order status system in Magento 2 can make a big difference in how smoothly your store runs. It helps your team track orders more efficiently and gives customers better visibility into what’s happening with their purchase.
For businesses with complex workflows — like handling pre-orders, processing made-to-order items, or managing partial shipments — setting up specific order statuses can simplify operations and reduce confusion. Magento 2 makes it easy to adapt the order flow to fit your exact business needs.
If you want to create Magento 2 order status and order state in the admin panel, connect with a Magento solution partner like Klizer. Our Magento solutions help you create order status and order state easily in your Magento store.