

ON THIS PAGE
Introduction
The admin theme is responsible for setting the look and feel of the backend panel. It shows how the admin interface gets styled, such as layouts, colors, fonts, and branding features. Magento offers a default backend theme out-of-the-box, but companies usually develop custom admin themes in line with their brand identity or for increased usability. In this blog, we will be discussing how Magento admin themes function.
In reality, only a few projects truly customise the admin panel, considering Magento’s complete flexibility in creating custom admin themes. Since the default Magento/backend theme already has all the features required for store management, most companies stick with it. But doing so also means they lose out on chances to enhance usability, speed up processes, or associate their branding with the backend. Developers frequently give the frontend store design a lot of attention while ignoring the backend.
By explaining the importance of the admin theme and how customisation can truly add value, this blog will close that gap.
What is an Admin Theme in Magento ?
An admin theme controls the appearance and functionality of the backend dashboard in Magento 2. It styles grids, buttons, menus, forms, layouts, and even the login page. Magento utilises the Magento/backend theme by default. This can be expanded by developers to create a unique theme with their own branding, including fonts, colours, and logos. Only store managers and admins can see the admin theme, in contrast to frontend themes that are visible to customers. Its primary responsibility is to maintain the backend’s usability and alignment with business requirements.
Why Customize the Admin Theme?
The admin theme can be customised in more ways than just adding a logo or altering the colours.A clean interface allows quicker adaptation and less training for new hires. All things considered, a custom admin theme improves the Magento backend’s usability, efficiency, and alignment with business requirements.

Who Needs a Custom Admin Theme?
A custom admin theme is valuable for a wide range of Magento users. Small businesses may want to add their brand identity, like logos and colors, to maintain consistency across their systems. Medium to large enterprises often need to streamline workflows and create role-specific dashboards to help employees manage data more effectively
Steps to Create a Custom Admin Theme in Magento 2
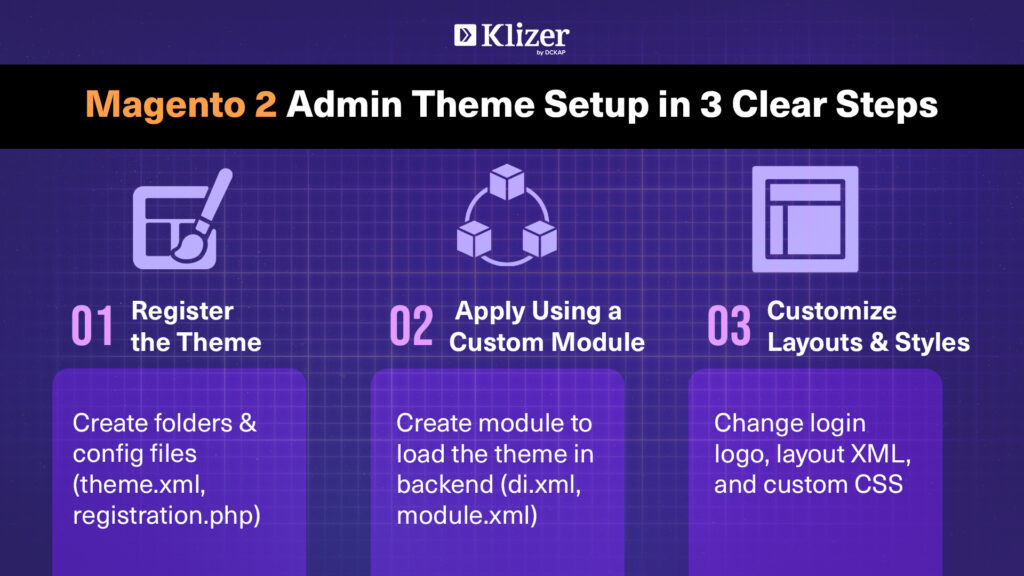
Step 1: Create Theme Folder
Go to your Magento installation and create a new folder for your theme
app/design/adminhtml/klizer/admintheme/Step 2: Register the Theme
Inside your theme folder, create a file called registration.php and add this code
<?php
use \Magento\Framework\Component\ComponentRegistrar;
ComponentRegistrar::register(ComponentRegistrar::THEME, 'adminhtml/Klizer/AdminTheme', __DIR__);
Step 3: Define Theme Configuration
Create a theme.xml file inside your theme folder
<theme xmlns:xsi="http://www.w3.org/2001/XMLSchema-instance" xsi:noNamespaceSchemaLocation="urn:magento:framework:Config/etc/theme.xsd">
    <title>Klizer Admin Theme for Magento 2</title>
    <parent>Magento/backend</parent>
</theme>
At this point, your Klizer Admin Theme is registered in Magento. Now, let’s move to apply part.
Your admin theme will not be applied automatically if you just register it with registration.php and theme.xml. The admin panel does not have a backend theme switch option.
We must create a custom module instructing Magento to load our theme for the admin area in order to apply our custom theme (Klizer/AdminTheme) Make sure to set the developer mode following commands before applying admin theme
bin/magento deploy:mode:set developer
Also Read: 12 Steps To Create A Custom Magento Theme Design
Steps to apply an admin theme
Step 1: Create a Custom Module Folder
Inside your Magento installation, create the following folder structure
app/code/Klizer/ApplyAdminTheme/Step 2: Register the Module
In your module folder, create registration.php
<?php
\Magento\Framework\Component\ComponentRegistrar::register(
    \Magento\Framework\Component\ComponentRegistrar::MODULE,
    'Klizer_ApplyAdminTheme',
    __DIR__
);
Step 3: Define Module Configuration
Create a file etc/module.xml inside your module folder:
<?xml version="1.0"?>
<config xmlns:xsi="http://www.w3.org/2001/XMLSchema-instance"
        xsi:noNamespaceSchemaLocation="urn:magento:framework:Module/etc/module.xsd">
    <module name="Klizer_ApplyAdminTheme" setup_version="1.0.0">
        <sequence>
            <module name="Magento_Theme"/>
        </sequence>
    </module>
</config>
This declares the module and ensures it loads after Magento_Theme.
Step 4: Configure Theme Application
Create a file etc/di.xml inside your module folder:
<?xml version="1.0"?>
<config xmlns:xsi="http://www.w3.org/2001/XMLSchema-instance"
        xsi:noNamespaceSchemaLocation="urn:magento:framework:ObjectManager/etc/config.xsd">
    <type name="Magento\Theme\Model\View\Design">
        <arguments>
            <argument name="themes" xsi:type="array">
                <item name="adminhtml" xsi:type="string">Klizer/AdminTheme</item>
            </argument>
        </arguments>
    </type>
</config>
This tells Magento to use your Klizer/AdminTheme as the active admin theme.
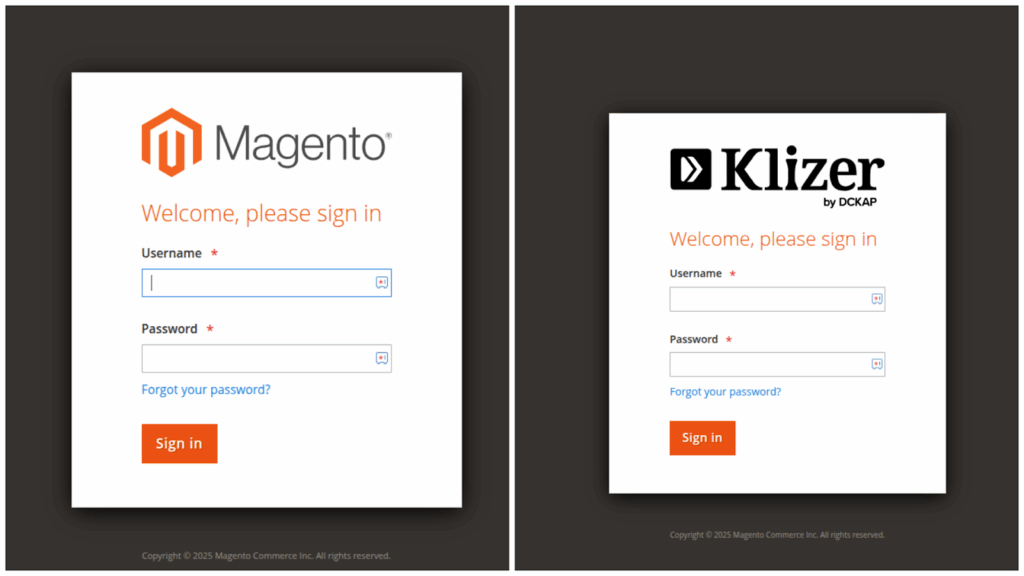
Steps to Overwrite Admin Login Layout
Making it truly unique comes next after applying the custom admin theme. Replacing the default Magento logo on the admin login page is the most popular and straightforward modification. This gives the backend a customised appearance and helps represent your company’s branding. Below are the steps to overwrite.
Step 1: Overwrite a Module Folder following path
app/design/adminhtml/Klizer/AdminTheme/Magento_Backend/layout/admin_login.xml<page xmlns:xsi="http://www.w3.org/2001/XMLSchema-instance" layout="admin-login" xsi:noNamespaceSchemaLocation="urn:magento:framework:View/Layout/etc/page_configuration.xsd">
<body>
<referenceBlock name="logo">
<arguments>
<argument name="logo_image_src" xsi:type="string">images/magento-icon.svg</argument>
</arguments>
</referenceBlock>
</body>
</page>Step 2: Add Your Custom Logo
Save your new logo as an SVG file and place it here
app/design/adminhtml/Klizer/AdminTheme/web/images/magento-icon.svgStep 3: Create a Custom Layout File for Styling
We have made some basic style changes, like updating colors and menus, to understand how custom CSS works in the admin theme. By doing this, you can clearly see how the file structure is followed and how Magento loads styles from your theme.
app/design/adminhtml/Klizer/AdminTheme/Magento_Backend/layout/default.xm<?xml version="1.0"?>
<page xmlns:xsi="http://www.w3.org/2001/XMLSchema-instance"
xsi:noNamespaceSchemaLocation="urn:magento:framework:View/Layout/etc/page_configuration.xsd">
<head>
<css src="css/admin-custom.css"/>
</head>
</page>Step 4: Add CSS File to Theme
app/design/adminhtml/Klizer/AdminTheme/web/css/admin-custom.css/* Set admin wrapper background */
.page-wrapper {
background-color: #f2f1fb !important;
}
/* Change menu sidebar color */
.menu-wrapper:before {
background-color: #211F54 !important;
}
/* Active or hovered menu item */
.admin__menu .level-0:hover > a,
.admin__menu .level-0._active > a {
background-color: #f2f1fb !important;
color: #211F54 !important;
}You are able to see the changes in action after finishing all the steps, including registering the theme, applying it through the module, and overriding layouts and styles below screenshot attached for your reference.

Conclusion
Creating a custom Magento 2 admin theme improves both usability and branding. Simply registering a theme is not enough—it must be applied using a module. After applying, developers can override layouts and styles, such as the login logo, background, or button appearance. These customizations make the backend cleaner, easier to navigate, and faster for store managers. While most projects use the default theme, creating a custom admin theme adds a professional, user-friendly, and efficient experience to the Magento backend.
Partner with a certified Adobe commerce development partner like Klizer to build tailored admin theme solutions that enhance your backend experience.