If you have worked with Shopify Plus stores, you may remember when developers could customize checkout by editing the checkout.liquid file. This approach offered greater flexibility, but it also came with some challenges, including high maintenance overhead and potential compatibility issues during theme updates and platform upgrades.
Shopify introduced Checkout Extensibility to provide a more structured way to customize the checkout experience. It allows developers to add custom functionality, modify checkout elements, and integrate business-specific features without directly editing Shopify’s core checkout files.
ON THIS PAGE
Understanding Shopify Checkout Extensibility
Shopify Checkout Extensibility is a collection of APIs, components, and tools that allows developers to customize the checkout experience natively within Shopify.
Instead of modifying the underlying checkout code, developers can use apps and custom components to add functionality through designated UI extension points.
This approach gives merchants more flexibility while keeping customizations separate from Shopify’s core checkout system. It also makes checkout updates and ongoing maintenance easier to manage.
Key Pillars of Checkout Extensibility
Shopify Checkout Extensibility includes several tools that handle different aspects of the checkout experience.
- Checkout UI Extensions:
These extensions allow developers to add custom UI elements to supported areas of checkout. Examples include custom fields, additional messages, and delivery instructions. They use Shopify’s supported components and run within a secure sandbox environment. - Checkout Branding API:
This API allows merchants and developers to customize the visual appearance of checkout. Supported settings include colors, typography, borders, layout, and other design elements across checkout and supported post-purchase pages. - Shopify Functions:
Shopify Functions allow developers to implement custom backend logic for checkout-related operations. Common use cases include custom discounts, payment method customization, and dynamic shipping rules. - Web Pixels API:
The Web Pixels API allows developers to manage customer event tracking and integrate analytics and third-party marketing tools securely without directly modifying checkout code.
Together, these tools help developers customize checkout functionality, appearance, and tracking while working within Shopify’s supported architecture.
Why the Shift from checkout.liquid Matters
Moving from checkout.liquid to Checkout Extensibility is more than an architectural update. It gives merchants and development teams a more structured way to manage checkout customizations.
Here are some of the key benefits:
- Better Performance Management:
Checkout UI Extensions run in an isolated environment and use Shopify-provided components and APIs. This helps keep custom functionality separate from the main checkout experience and reduces reliance on additional scripts. - Simpler Platform Updates:
Since extensions work through Shopify’s supported APIs and extension points, merchants do not have to maintain custom modifications to the underlying checkout template. This reduces the risk of custom code conflicts during platform updates. - Enhanced Security:
Checkout UI Extensions operate in a secure sandbox and do not have direct access to sensitive payment information or the checkout page’s underlying HTML. This helps protect customer data while allowing developers to add supported functionality. - Shop Pay Compatibility:
Shopify’s extension framework supports compatible customizations in supported checkout experiences, including Shop Pay. However, developers should verify individual extension capabilities and compatibility across different checkout methods.
How to Customize Shopify Plus Checkout: Step-by-Step
The following steps outline a basic workflow for Shopify Checkout development, whether you are building a custom app for a client or developing an internal feature.
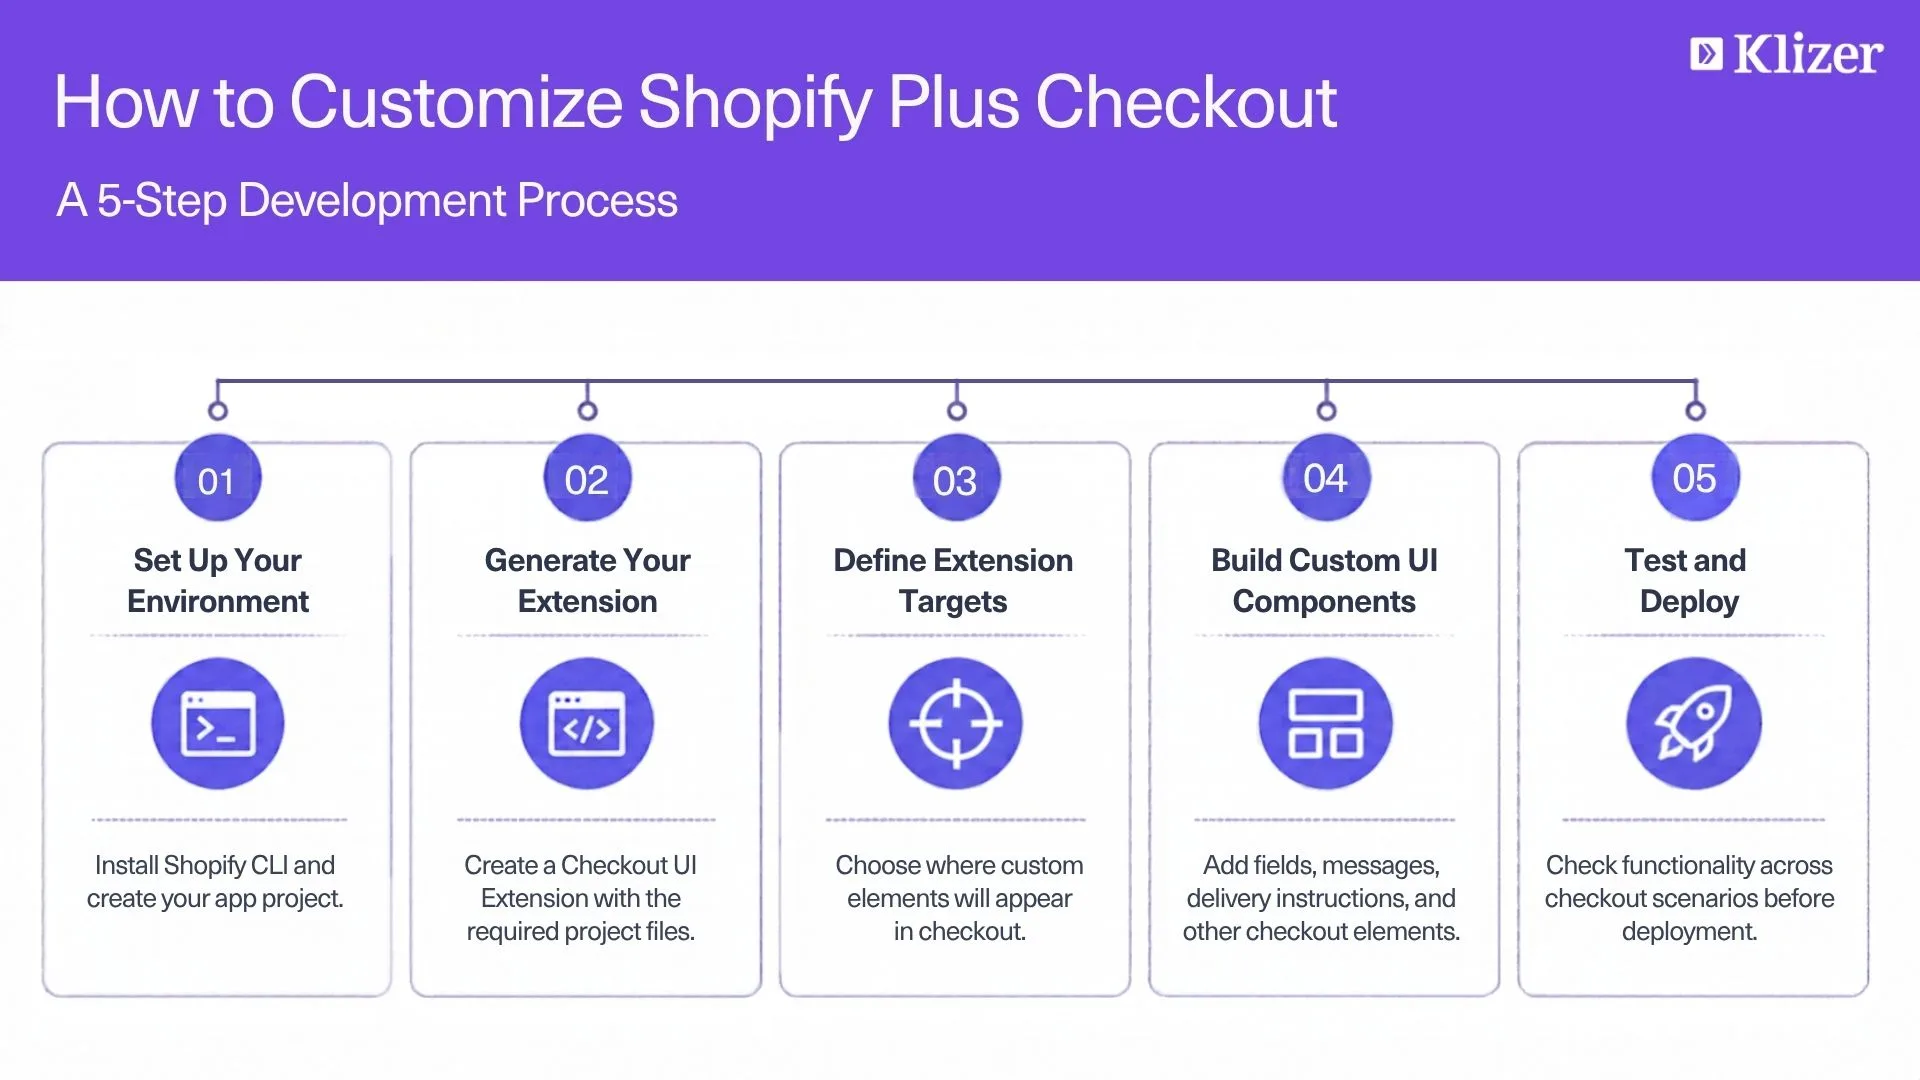
Step 1: Set Up Your Local Development Environment
Start by installing the latest Shopify CLI on your system.
| # Initialize a new app extension project
shopify app generate extension –template checkout_ui |
Step 2: Create the Extension Project
Select Checkout UI Extension when prompted. Shopify CLI will create a project directory with the necessary files, including source files, configuration files (shopify.extension.toml), and dependencies.
Step 3: Define Extension Targets (UI Placement)
Extension targets determine where your custom components appear in the checkout experience. Depending on the feature you are building, you can place components in supported locations, such as before contact information, above line items, or under the payment section.
In your extension’s shopify.extension.toml file, specify the target:
| Ini, TOML
[[extensions.targeting]] target = “purchase.checkout.block.render” module = “./src/CheckoutBlock.jsx” |
Step 4: Build UI Components with React and Web Components
Shopify provides a collection of pre-styled components, such as BlockStack, TextField, Banner, and InlineLayout. These components are designed to match the native look and feel of the checkout page.
Here is a practical example demonstrating how to add a custom order note or delivery instruction field:
| JavaScript
import { |
Note: The code above retains the original React-based implementation. Verify its compatibility with the Shopify API version being used before publishing or implementing it. Shopify’s React-based Checkout UI Extensions have version-specific support limitations.
Implement Backend Rules with Shopify Functions
Shopify Functions allow developers to implement custom business logic that runs on Shopify’s infrastructure.
Functions written in supported languages, including Rust and JavaScript, can handle complex requirements such as tiered wholesale pricing, payment method restrictions, and dynamic shipping rules.
For example, a merchant may want to hide specific payment methods, such as Cash on Delivery, for customers in a particular region.
The implementation process generally involves:
- Generate a Payment Customization function using Shopify CLI.
- Define the required checkout data through GraphQL queries in input.graphql.
- Write the function logic to evaluate customer attributes, order values, or other checkout conditions.
- Return the required operations to hide or reorder supported payment methods.
- Test the function against different checkout scenarios before deploying it.
This allows merchants to apply business-specific payment rules without modifying the underlying checkout code.
Apply Global Styling with the Branding API
A consistent checkout design helps maintain brand identity throughout the purchasing journey.
Shopify’s Checkout Branding capabilities allow developers and merchants to customize the visual appearance of checkout through supported configuration options and the checkout editor.
You can modify several design elements, including:
- Typography: Configure supported brand fonts for headings and body text.
- Colors: Customize accent, button, background, and surface color palettes.
- Border Radius and Spacing: Adjust the appearance of form fields, rounded edges, and padding density.
- Layout: Configure supported layout options to maintain a consistent checkout experience.
These settings help align the checkout experience with the store’s overall visual identity while maintaining a familiar and easy-to-use interface.
Best Practices for Checkout UI Extensions
Building a custom checkout experience requires more than adding new features. Developers should also consider performance, usability, and maintainability.
Here are some best practices to follow:
- Leverage Metafields for Dynamic Data:
Store configurable information in metafields when appropriate. This allows merchants to manage extension settings through the Shopify admin without requiring code changes for every update. - Optimize for Mobile Viewports:
Make touch targets large enough for comfortable interaction. Ensure form fields and other elements work well on smaller screens without horizontal scrolling, and test across different devices. - Keep UI Extensions Lightweight:
Avoid unnecessary dependencies and complex operations. Keep extension code focused on the functionality customers actually need to maintain a smooth checkout experience. - Handle Errors Gracefully:
Always provide appropriate fallbacks. If an API request within an extension fails, the checkout process should not unnecessarily prevent customers from completing their purchases. - Test Across Checkout Scenarios:
Test extensions with different customer types, cart values, payment methods, and shipping conditions. This is especially important for stores with complex B2B checkout requirements.
Conclusion
Shopify Checkout Extensibility gives developers a structured way to add custom gift messages, additional checkout fields, payment rules, and personalized checkout content to Shopify Plus stores.
By moving away from direct checkout template modifications and using Shopify’s UI Extensions, Functions, and native APIs, developers can create checkout experiences that are easier to maintain and adapt to changing business requirements.
For enterprise stores with complex checkout requirements, the right development approach can make a significant difference. Klizer’s Shopify Plus development services help businesses build and customize checkout experiences that support their unique requirements. Contact us to discuss how Shopify Checkout Extensibility can support your business needs.